

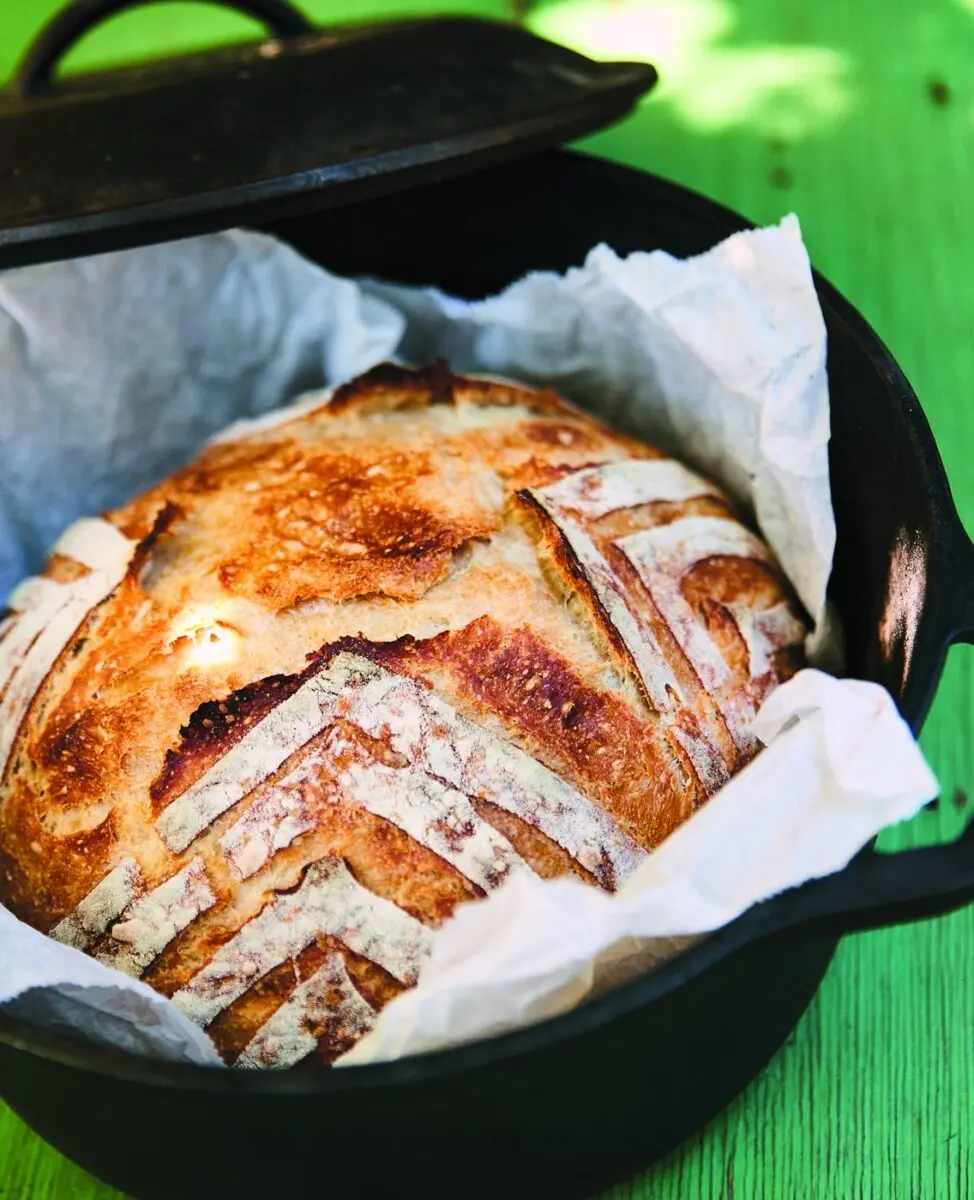
For a long time I wondered whether anyone would really bake bread over a campfire — whether it was worth the trouble. It is. I simplified my usual recipe into a nomadic version of artisan bread, one that’s genuinely easy to pull off even though it asks for a little patience, and that might turn out to be the best loaf you eat all trip. This isn’t a stunt recipe. It’s real bread, real crust, made with a cast iron pot and a pile of charcoal instead of a steam-injected oven.
Below: the dough, mixed and started well before you’re anywhere near a fire; the shaping and second rise; and the part that scares people off — baking in a dutch oven buried in coals. I’ll give you the exact briquette numbers, what to do if your fire runs hot or cold, and how to save the loaf if the bottom scorches. No campfire? A backyard fire pit, a fireplace, or your kitchen oven all get you there too.
❤️ Why You’ll Love This Dutch Oven Bread
- Real bakery bread from camp gear. A cast iron dutch oven and briquettes get the same crackling crust as a steam-injected oven.
- Most of the work happens at home. Mix the dough and cold-ferment it in the fridge up to 3 days before you leave.
- No kneading required. A spatula and a long, slow rise do the job a dough hook usually does.
- The fire math is simple. Ten briquettes under, nineteen on the lid — that alone holds the pot near 450°F.
- It rescues itself. A scorched bottom has a built-in fix.
- Nothing goes to waste. Day-old dutch oven bread becomes croutons, breadcrumbs, French toast, or pan con tomate.
🍞 Why a Slow-Fermented Bread Belongs In a Fire Cooking Book
Most bread cooked outdoors is the quick kind — bannock in a pan, dough twisted onto a stick. This is the opposite: a long, slow-fermented dough, the kind you’d normally trust only to a kitchen oven, adapted to work with a cast iron pot and charcoal instead. The long ferment builds the flavor; the dutch oven traps steam around the dough for the first stretch of baking, the same trick professional bakeries pull off with injection ovens. That’s why this crust cracks audibly when you press on it — and none of it requires an actual campsite. A backyard fire pit, a fireplace, or a chimney starter on the barbecue all work the same way: hot, ashed-over charcoal and a lidded cast iron pot are all that matter.

🌾 The Dough: Flour, Water, Salt, Time
Nothing exotic here, which is the point. Water, yeast, flour, salt. I usually use unbleached white flour on its own, but for more character in the crumb, swap in a blend — 420 g white flour to 40 g rye and 40 g whole wheat is the ratio I keep coming back to. The rye especially adds more depth than you’d expect from such a small amount. Any active dry or instant yeast works, or fresh baker’s yeast if that’s what you keep on hand — the amounts are small either way, because this dough has hours to develop, not minutes. Salt goes in at mixing time, ideally sea salt, for how evenly it dissolves through a wet dough like this one.
🏠 Before You Leave Home: Mix, Ferment, Chill
This bread starts on your counter, not outdoors. Weigh the water into a big bowl, add the yeast, flour, and salt, and stir with a spatula until it comes together into a shaggy, fairly uniform dough — no kneading needed. A short knead won’t hurt if you can’t help it, but the recipe doesn’t need one to work.
Cover the bowl and let it sit at room temperature 4 to 6 hours, then move it to the fridge. Cold dough is easier to shape, and the slow, cold fermentation builds a more pronounced flavor and a more open, holey crumb than a fast rise ever gives you. It’s also what makes this bread genuinely make-ahead — mix it and let it ferment in the fridge up to 3 days before you plan to bake, which is rare for a yeasted bread and useful when you’re packing for a trip.
🪵 Shaping and the Second Rise
When you’re ready to bake, turn the chilled dough onto a floured surface, fold it over on itself a few times, then shape it into a ball with a dough scraper or by rotating it against the counter, flouring as you go. Set it on a square of parchment paper, dust the top with flour, and drape a clean towel over it. Let it rest 2 to 3 hours around 70°F (21°C) — on a hot day 45 minutes might be enough; in the cold, give it longer and watch the dough, not the clock. It’s ready when it looks relaxed and a little puffed, not tight.

🔥 The Briquette Method: 29 Coals for 450°F
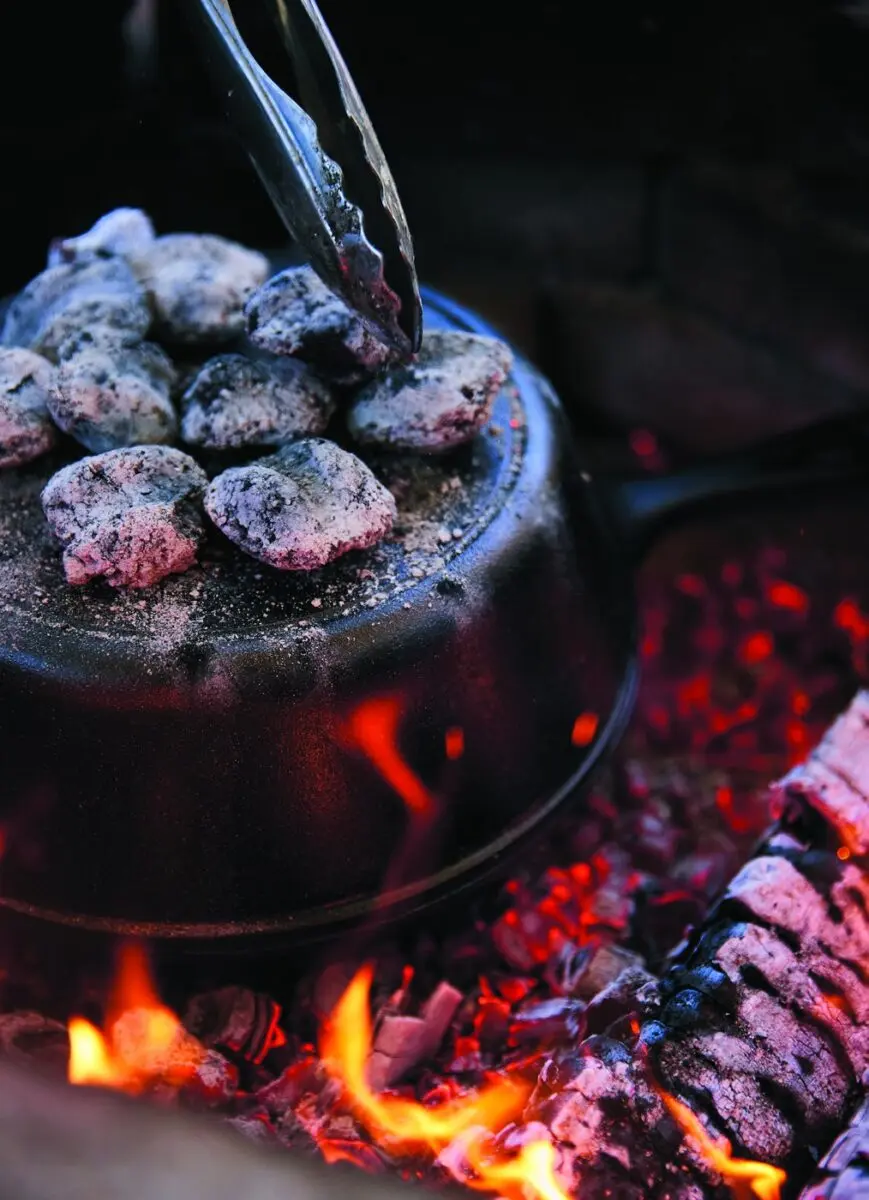
This is the part that trips people up, and it’s really just arithmetic. About 30 minutes before baking, light 29 charcoal briquettes in a chimney starter and tip them into your fire pit or fireplace. Let them build into a small pyramid until lightly ashed over — that grey coating means they’re at cooking temperature, not still building heat.
With long tongs, spread 10 briquettes over an area about as wide as your dutch oven’s bottom, and set the pot — lid on — right on top. Arrange the remaining 19 briquettes on the lid. That split, 10 under and 19 on top, gets you to roughly 450°F (230°C) inside a 10-inch (25 cm) dutch oven, the size this recipe is written for. Let it preheat while the dough finishes its second rise.
When the pot is hot, trim the parchment close around the dough ball and score the top a few times with scissors or a serrated knife, so the bread has somewhere to expand instead of splitting wherever it wants. Using the parchment as a sling, lower the dough into the dutch oven without touching the pot — it’s genuinely hot. Lid back on, briquettes repositioned on top.
⏱️ Baking: The Quarter Turn and Knowing When It’s Done
Every 10 minutes, give the dutch oven a quarter turn. Coals never heat perfectly evenly — one side of your fire is almost always hotter — and rotating the pot is what keeps the loaf from coming out dark on one side and pale on the other. It’s the easiest step to forget and the easiest one to get right, so set a timer if you tend to lose track by a fire.
Baking takes 35 to 40 minutes. Briquette cooking isn’t an exact science — wind, ambient temperature, and how fresh your coals are all shift things — so a thermometer helps: the bread is ready at 195°F (90°C) at the center. No thermometer? Knock on the bottom with a knuckle — hollow means done, a dull thud means it needs more time. If the bottom starts scorching before the loaf is baked through, pull the dutch oven off the direct heat and finish with briquettes on the lid only; the hot cast iron keeps cooking the bread gently, like a small residual-heat oven, without burning it any further.
Once it’s out, lift the bread from the dutch oven, peel away the parchment, and set it on a rack to cool. It needs that rest — the crumb is still setting — but I won’t pretend anyone at my campsite has ever left a loaf alone for a full hour.
🧑🍳 Manon’s Tips for Baking Bread on Coals
A few things I’ve learned the hard way.
- Wait for ash, not flame. Briquettes are ready when lightly grey, not glowing. New to coal beds? See our guide to building a fire.
- Treat the chimney starter with respect. Hot briquettes and long tongs deserve a real safety routine — NFPA’s charcoal safety basics are worth five minutes before your first attempt.
- Season your dutch oven before it meets a fire. A well-seasoned pot releases the loaf cleanly. Ours needed work — see our cast iron care guide.
- Set a timer for the quarter turns. Ten minutes flies by at a fire.
- Trust the knuckle test. A hollow knock is as reliable as 195°F at the center.
- Let the coals go fully out before you pack up. A dutch oven holds heat long after baking — see our guide to putting out a campfire properly.
🍽️ Serving, Keeping, and What To Do With Day-Old Bread
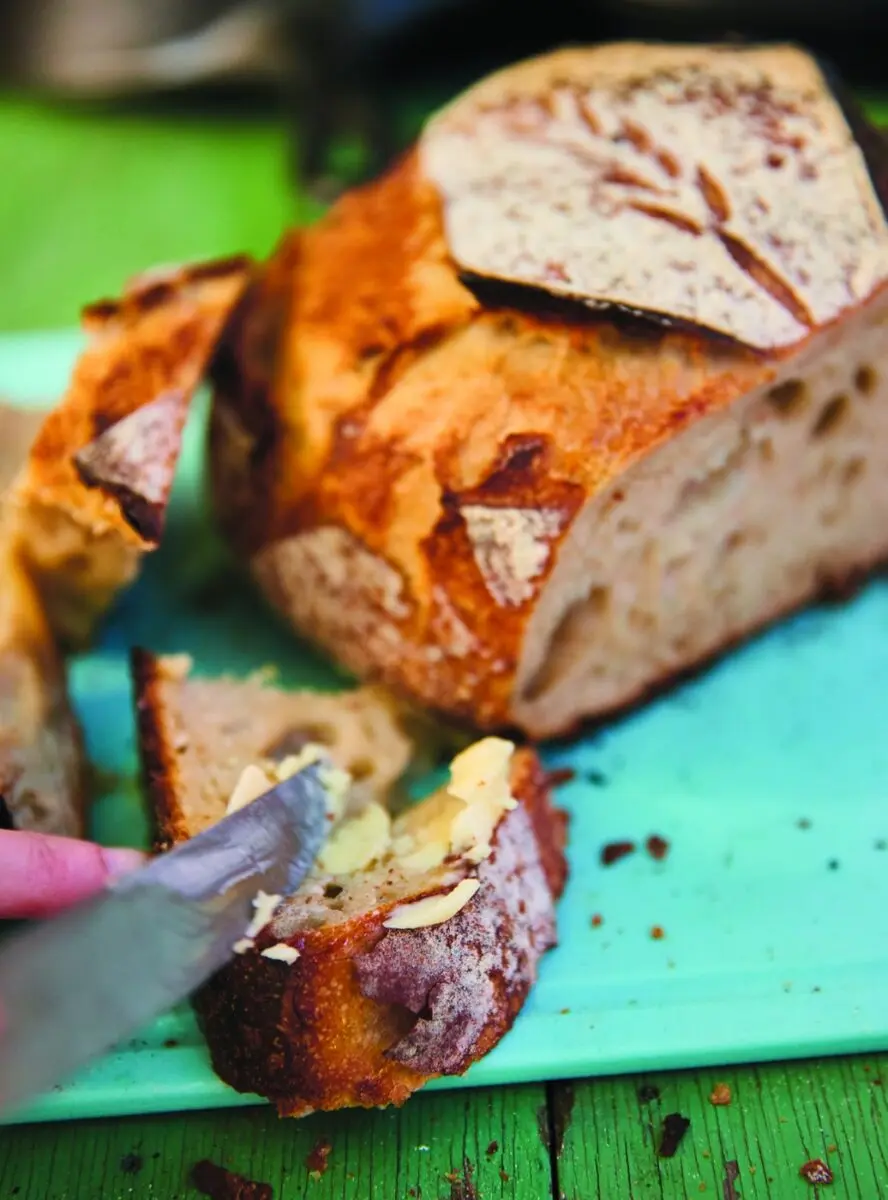
Let it cool before you cut in, then tear or slice it however you like — this crust is sturdy enough to handle butter melting straight into a warm slice, the best way to eat the first piece. It’s best the day it’s baked, but a day-old slice toasted with butter is its own kind of good. Don’t throw out what’s left, either: stale dutch oven bread makes excellent croutons, seasoned breadcrumbs, French toast, or pan con tomate. This dough was never meant to be precious — it’s meant to get eaten, one way or another, down to the last crust.
- Croutons or breadcrumbs. Cube or pulse stale bread and toast for salads, soups, or a crunchy topping.
- French toast. The dense, holey crumb soaks up custard without falling apart.
- Pan con tomate. Toasted, rubbed with garlic and ripe tomato, finished with olive oil.
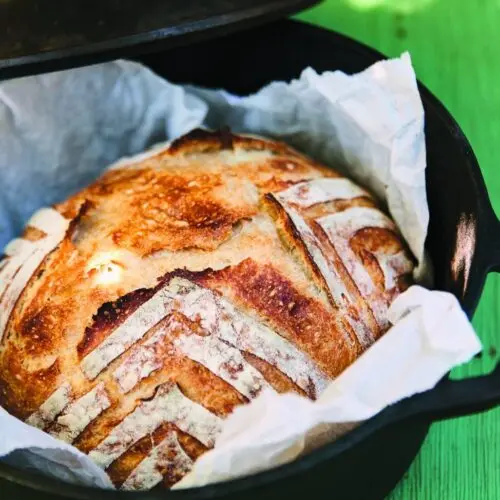
Dutch Oven Bread
Equipment
- 1 cast iron dutch oven (at least 3 L / 3 qt) with a tight-fitting lid
- 29 charcoal briquettes more or less depending on the size of your dutch oven
- 1 chimney starter
- 1 long fire tongs for moving hot briquettes
- 1 sheet of parchment paper
- 1 kitchen scale
Ingredients
For the dough
- 350 g water
- 1/2 tsp (1.5 g) active dry yeast or instant yeast or 1 tsp (3 g) fresh baker’s yeast
- 500 g unbleached white flour or a blend: 420 g white flour, 40 g rye flour, 40 g whole wheat flour
- 2 tsp (10 g) salt ideally sea salt
Instructions
Make it ahead
- Set a large bowl on a kitchen scale. Pour in the water, then add the yeast, the flour (or flour blend), and the salt.
- Combine with a spatula until you have a fairly uniform, shaggy dough. A quick knead won’t hurt, but it isn’t needed for this recipe to work.
- Cover the bowl with plastic wrap or a shower cap and let it rest at room temperature for 4 to 6 hours.
- Move the bowl to the fridge. Cold dough is easier to shape, and the slow, cold fermentation gives a more pronounced flavor and a more open crumb. You can mix the dough at home and let it ferment in the fridge for up to 3 days ahead of time.
Shape and Let Rest
- Turn the dough out onto a floured surface and fold it over on itself. Shape it into a ball using a dough scraper or by rotating it against the counter, flouring as needed.
- Transfer the ball to a square of parchment paper. Dust the top with a little flour and cover with a clean kitchen towel. Let it rest 2 to 3 hours at around 70°F (21°C) — about 45 minutes if it’s very hot out, longer if it’s cold.
Build the Coal Bed and Bake
- About 30 minutes before baking, light 29 charcoal briquettes in a chimney starter and tip them into the fire. Let them build into a pyramid until lightly ashed over.
- With tongs, spread 10 briquettes over an area about the width of your dutch oven and set the pot, lid on, on top. Arrange the remaining 19 briquettes on the lid and let the pot preheat.
- Cut the parchment paper close around the dough ball. Score the top a few times with scissors or a serrated knife so the bread has room to expand, then use the parchment as a sling to lower the dough into the dutch oven without touching the hot pot. Put the lid back on and reposition the 19 briquettes.
- Every 10 minutes, give the dutch oven a quarter turn to even out hot spots from the coals.
- Bake 35 to 40 minutes. The bread is ready when it reaches 195°F (90°C) at the center, or when tapping the bottom produces a hollow sound.
- If the bottom starts to burn, pull the dutch oven off the heat and finish baking with only the briquettes on the lid — the hot cast iron acts like a mini oven on residual heat.
- Lift the bread out of the dutch oven, remove the parchment paper, and set it on a rack to cool.
Notes
- Skipping the fridge and rising at room temperature
- What size dutch oven you need
- Why the pot needs to preheat first
- Fixing uneven browning on one side
- What to do if the bottom burns
- Whether you need a thermometer
- Baking it without a campfire at all
- Doubling the recipe for a bigger group
- Using cups instead of a kitchen scale
❓ Frequently Asked Questions
Can I skip the fridge and just let the dough rise at room temperature?
You can, but you’ll lose part of what makes this bread good — the cold ferment builds deeper flavor and a more open crumb, and lets you mix days ahead. A longer room-temperature rise still works, just flatter in flavor.
What size dutch oven do I need?
At least 3 L (3 qt) with a tight-fitting lid. The briquette count here — 29 total, 10 under and 19 on top — is calibrated for a 10-inch (25 cm) pot at around 450°F; a different size just means adjusting the coal count roughly in proportion.
Why does the pot need to preheat before the dough goes in?
A hot pot gives the dough an immediate lift and starts the crust forming right away, instead of letting the dough slowly warm and spread before it sets. That head start is a big part of why this bread gets an open crumb and a thick, crackling crust.
One side of my bread keeps browning faster than the other. What’s going on?
That’s a hot spot, and it’s normal — coals never heat evenly. It’s exactly why the recipe has you give the dutch oven a quarter turn every 10 minutes; skip that step and uneven coloring is the first thing you’ll notice.
The bottom of my loaf burned. Is it ruined?
Not necessarily. Catch it early and pull the dutch oven off the direct heat, finishing with briquettes on the lid only — the hot cast iron keeps baking the bread without adding more heat underneath. If the bottom crust is still too dark once it’s done, you can trim it off after baking.
Do I need a thermometer to know when it’s done?
It helps, since briquette baking runs warmer or cooler depending on conditions, but it isn’t essential. Knock on the bottom of the loaf — hollow means done, a dense thud means it needs more time either way.
Can I bake this without a campfire at all?
Yes. A wood-fired oven or a regular kitchen oven works just as well — preheat to 450°F (230°C) with the covered dutch oven inside, bake covered 35 to 40 minutes, and check for 195°F (90°C) at the center.
Can I double this recipe for a bigger group?
Mix a double batch if you like, but bake it as two loaves in two pots rather than one big dough ball in one — the briquette count here is calibrated for one loaf per pot.
Do I need a kitchen scale, or can I use cups?
A scale, ideally. This dough is written in grams on purpose, and small errors show up fast in a wet, no-knead dough. No scale at camp? Weigh everything at home first.