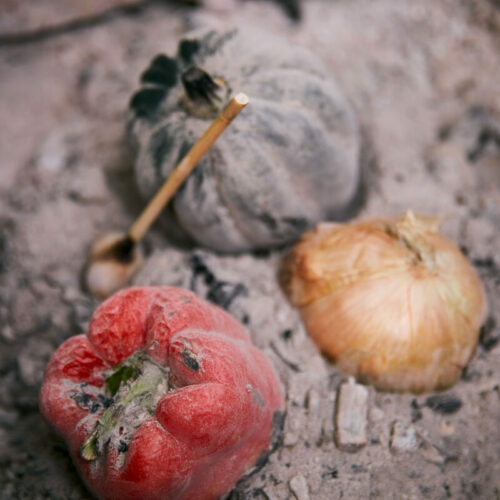
Ember Roasted Vegetables (Caveman Veggies)
Whole vegetables buried straight in the embers, skin on — no pan, no grate, no oil. Under the charred surface hides a tender, smoky flesh you cannot get any other way.
Equipment
- 1 fire pit or open fireplace
- 1 shovel or long tongs
- 1 skewer to test for doneness
Ingredients
Choose your vegetables
- 4 potatoes or sweet potatoes, scrubbed, skin on
- 4 onions unpeeled, root end trimmed flat
- 1 head garlic whole, unpeeled
- 4 beets or rutabagas scrubbed, skin on
- 1 small winter squash whole, or halved if large
- 2 red peppers whole — red, orange or yellow
To finish
- good olive oil to drizzle
- flaky salt to taste
- pepper freshly ground
- butter, herbs or lemon optional, to serve
Instructions
Build the ember bed
- Keep a fire going long enough to produce a deep bed of glowing embers — an hour or more of steady burning. You want embers, not flames: the heat should be intense and even, with no fire licking upward.
- Rake the embers into a nest with a shovel or a stick, leaving a hollow in the middle.
Root vegetables, onions and garlic
- Set the vegetables directly on the embers, skin on. Do not peel, do not oil, do not wrap — the skin is the cooking vessel. Wrap in aluminum foil only if you prefer a cleaner, steamier result.
- Rake some embers up around and over them and let them cook. Turn them once or twice so every side spends time against the heat.
- They are done when the skin is charred and the vegetable looks completely deflated and feels very tender — skewer tender, or even touch tender. Under the blackened surface you will find soft flesh with a taste the fire gave it. Count roughly 20 to 30 minutes for onions and potatoes, 30 to 45 for beets, rutabagas and squash, depending on size and on how hot your embers are.
Whole squash
- Bury a small winter squash in the embers and leave it there until a skewer slides in with no resistance. Halve it, scoop out the seeds and serve it straight from the shell.
Peppers
- Set whole peppers directly on a nest of embers. Turn each one as the side in contact with the embers blackens, until you have gone all the way around. If the skin bursts in spots, do not worry — your ash is clean.
- Pack the charred peppers into aluminum foil or a paper bag and let them sweat for about ten minutes. The skins will then slip off with your fingers.
Serve
- Brush the ash off, split the vegetables open and dress them while hot with good olive oil, flaky salt and pepper — or butter, herbs, or a squeeze of lemon.
Notes
Which vegetables work. Anything with a relatively thick skin and a high water content: onions, garlic heads, potatoes, sweet potatoes, beets, rutabagas, carrots, squash and pumpkin. Thin-skinned vegetables such as tomatoes will not survive the embers.
No cooler needed. Potatoes, carrots, leeks, beets, sweet potatoes, cabbage, onions, rutabagas, daikon and turnips all hold 2 to 3 days at room temperature — handy if you're camping and want to skip the cooler.
On peppers. Red, orange and yellow. Green peppers are simply unripe ones, and I will not be taking questions.
Foil or no foil. Straight on the embers gives you smoke and char; wrapped in foil gives you a steamier, milder vegetable and a tidier peel. Both are correct.
Timing is a guide, not a rule. Ember heat varies enormously. Judge by tenderness, never by the clock.
See the frequently asked questions
- Wrapping vegetables in foil
- How long ember roasting takes
- Whether the charred skin is safe to eat
- Cooking in a fireplace at home
- Which vegetables to avoid
- Oiling or seasoning before roasting
- How to tell when the embers are ready
- Whether to peel vegetables before roasting
- Roasting different vegetables together
- Green peppers